How to Install Arlo Solar Panel: The Ultimate Guide
To install an Arlo Solar Panel, simply connect it to your Arlo camera via the charging cable, adjust the panel’s position for maximum sunlight exposure, and secure it using the included mounting hardware. The Arlo Solar Panel is an efficient and cost-effective solution for ensuring the uninterrupted operation of your Arlo camera.
By harnessing the power of the sun, you can eliminate the need for manual battery charging and enjoy continuous surveillance. Installing the Arlo Solar Panel is a simple process that requires connecting it to your camera and positioning it in a sunny location.
We will provide step-by-step instructions for installing the Arlo Solar Panel, allowing you to power your Arlo camera with ease and convenience.
Understanding Arlo Solar Panel
The How to Install Arlo Solar Panel is an innovative accessory designed to provide a continuous power source for your Arlo security cameras. By harnessing the sun’s energy, this solar panel eliminates the need for traditional batteries or frequent charging. In this section, we will delve into what the Arlo Solar Panel is, its benefits, and how to install it.
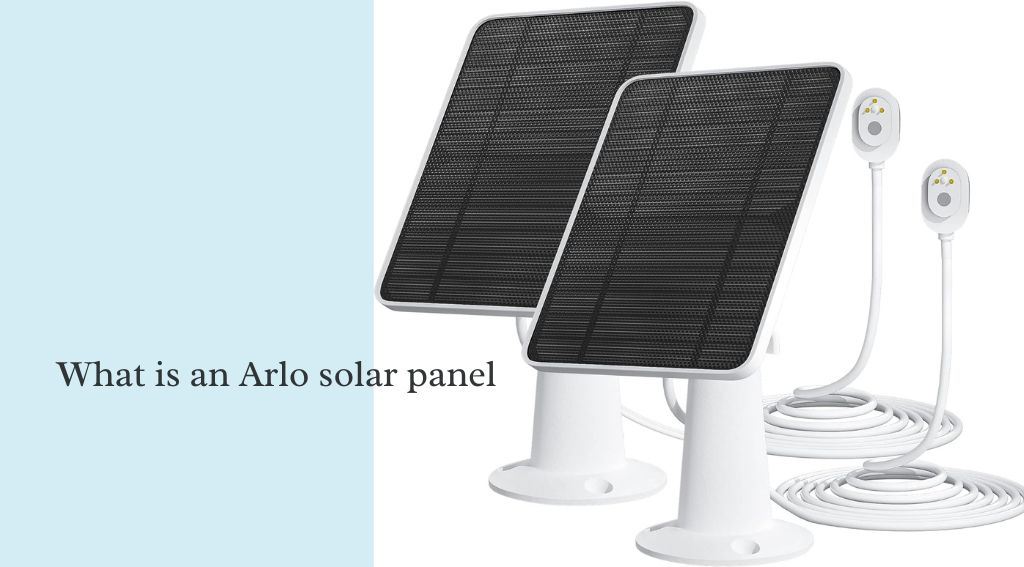
What is an Arlo solar panel?
The Arlo Solar Panel is a high-quality solar panel specifically designed for use with Arlo security cameras. It acts as an eco-friendly and cost-effective alternative power source that ensures your cameras remain fully functional at all times. With the Arlo Solar Panel, you can take advantage of the sun’s energy to power your cameras, making it a sustainable and hassle-free solution.
Benefits Of Using Arlo Solar Panel
There are several advantages to using the Arlo solar panel:
- Continuous Power Supply: With the solar panel, you can have a constant power supply for your Arlo cameras, ensuring uninterrupted surveillance.
- Cost-effective: By harnessing solar energy, you eliminate the need for expensive batteries or frequent charging, saving you money in the long run.
- Eco-friendly: Using solar power reduces your carbon footprint, contributing to a greener environment.
- Convenience: The Arlo Solar Panel is easy to install and requires minimal maintenance, providing a hassle-free power solution for your security cameras.
Installing an Arlo solar panel offers a range of benefits that enhance the functionality and sustainability of your Arlo security system. In the next section, we will guide you through the installation process to ensure you can start enjoying the advantages of solar-powered surveillance.
Preparing For Installation
Preparing for installation is an important step to ensure a smooth and successful setup of your Arlo Solar Panel. Before getting started, there are a few key things you need to consider. In this section, we will discuss how to check compatibility with your Arlo devices, gather the necessary tools and equipment, and determine the optimal location for installation. Why Do My Solar Lights Turn Off At Night
1. Checking Compatibility With Arlo Devices
Before installing the Arlo Solar Panel, it is crucial to make sure that it is compatible with your Arlo devices. This will help ensure that the solar panel can effectively power your devices and provide a reliable source of energy.
To check compatibility, refer to the official Arlo website or user manual for a list of supported devices. Additionally, you can check the model number of your Arlo devices and compare it with the compatibility list to ensure a match. It is essential to verify compatibility to avoid any potential compatibility issues or damage to your devices.
2. Gathering Necessary Tools And Equipment
An important step in preparing for the installation of the Arlo Solar Panel is to gather all the necessary tools and equipment. Having everything you need in advance will save you time and ensure a smoother installation process.
Here are some of the essential tools and equipment you will need:
- Screwdriver (compatible with your Arlo devices)
- Mounting hardware (included with the Arlo Solar Panel)
- Drill (if required for installation)
- Power cable (included with the Arlo Solar Panel)
- Surface mount (if needed)
- Ladder (if the installation location requires elevated access)
By gathering these tools and equipment beforehand, you can ensure a seamless installation process without any interruptions.
3. Determining The Optimal Location For Installation
Choosing the right location for your Arlo solar panel is crucial to maximizing its efficiency and effectiveness. The solar panel should be placed in an area that receives ample sunlight throughout the day.
Here are a few factors to consider when determining the optimal location:
- Position the solar panel in a spot where it has direct access to sunlight for the majority of the day. Avoid placing it in shaded areas or spots with limited sunlight.
- Consider the orientation and tilt angle of the solar panel. Position it to face the sun directly, ensuring maximum exposure to sunlight.
- If possible, choose a location that is close to your Arlo devices to minimize cable length and potential power loss.
- Ensure that the installation location is secure and stable to prevent any damage or interference.
By carefully considering these factors and selecting the optimal location for your Arlo Solar Panel, you can enhance its performance and make the most of its solar energy capabilities.
Installing The Arlo Solar Panel
Installing the How to Install Arlo Solar Panel is a smart and efficient way to power your Arlo cameras, ensuring that they never run out of battery. The solar panel harnesses the energy of the sun to constantly charge the camera’s battery, providing a continuous power supply. In this guide, we will walk you through the process of installing the Arlo Solar Panel step by step, so you can start enjoying hassle-free surveillance.
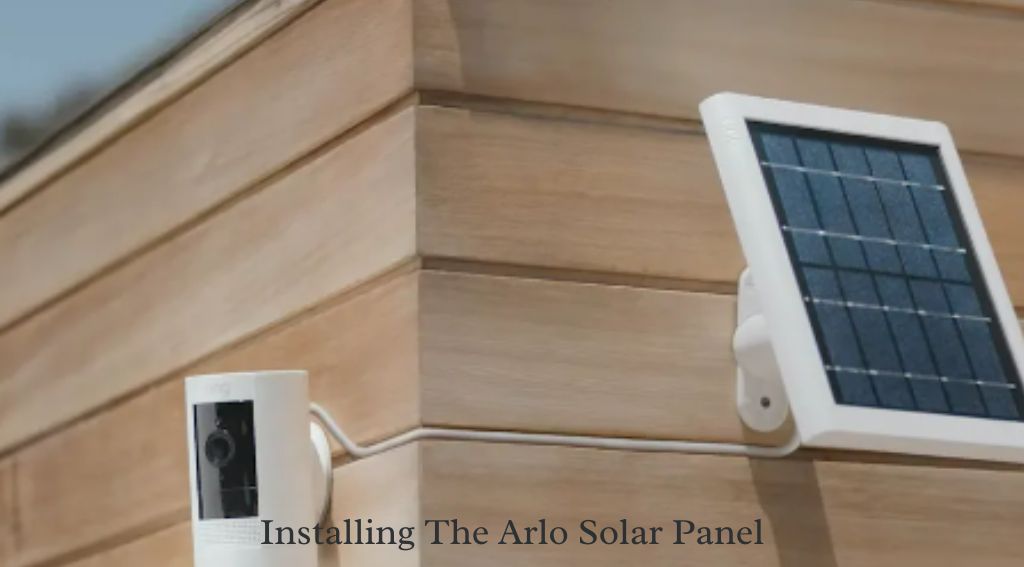
Mounting The Solar Panel
Mounting the Arlo Solar Panel is straightforward and requires a few simple steps. Before you begin, ensure that you have chosen the optimal location for maximum sunlight exposure.
- Choose an outdoor area that receives ample sunlight throughout the day. It is essential to place the solar panel in a location where it can capture maximum sunlight for optimal performance.
- Using the provided mounts and screws, attach the solar panel to a sturdy surface, such as a wall or a wooden post. Make sure the panel is securely fastened to prevent any movement or damage.
- Ensure that the solar panel is positioned at an angle that allows it to absorb sunlight efficiently. A general rule of thumb is to tilt the panel towards the equator or your geographical location’s latitude. This angle ensures that the panel receives the maximum exposure to the sun’s rays.
Connecting The Solar Panel To The Arlo Device
Once you have mounted the solar panel, it’s time to connect it to your Arlo device. The process is simple and quick:
- Locate the power port on your Arlo device. It is usually located on the back or underside of the camera.
- Connect one end of the power cable that the Arlo Solar Panel has provided to the camera’s power port.
- Connect the other end of the cable to the port on the back of the solar panel. Ensure that the connections are secure and snug.
- Check if the LED indicator lights up on both the camera and the solar panel, indicating a successful connection.
Adjusting The Angle For Maximum Sunlight Exposure
To ensure optimal charging efficiency, it is crucial to adjust the angle of the solar panel:
- Loosen the screws that hold the solar panel’s bracket in place.
- Adjust the angle of the panel according to your needs. Keep in mind the position of the sun and the amount of direct sunlight the panel is receiving.
- Tighten the screws to secure the panel at the desired angle.
By following these simple steps, you can install the Arlo Solar Panel and power your cameras effortlessly. Enjoy uninterrupted surveillance and peace of mind, knowing that your cameras are always charged and ready to capture any activity.
Maximizing The Performance Of Arlo Solar Panel
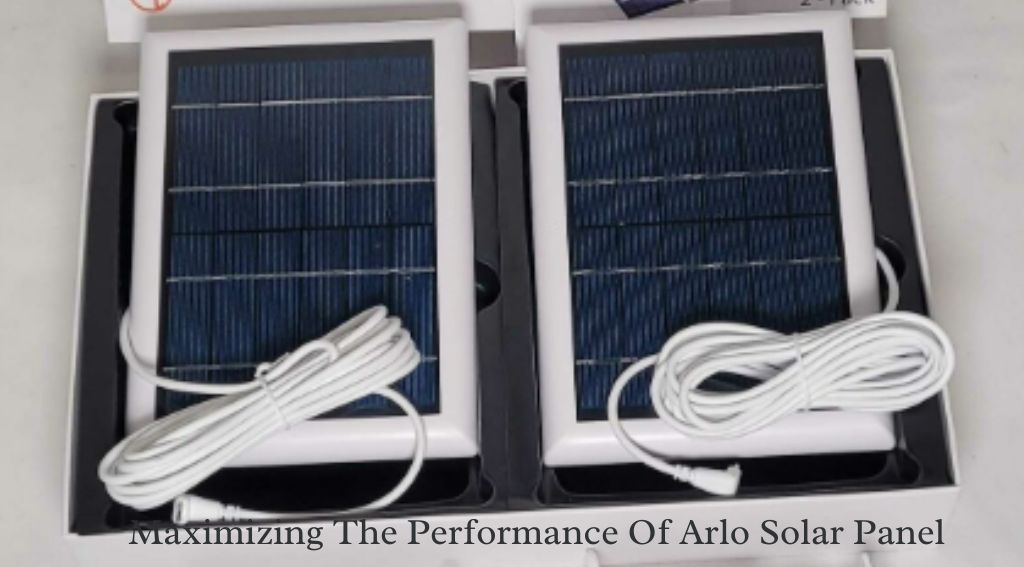
Tips For Enhancing Solar Panel Efficiency
Installing the Arlo Solar Panel is a smart move towards a more sustainable and cost-effective way of powering your Arlo cameras. To truly maximize the performance of your solar panel, here are some essential tips to ensure optimal efficiency:
Monitoring And Maintaining The Solar Panel
Maintaining and monitoring your Arlo Solar Panel regularly will help maintain its efficiency and ensure that it delivers the power required to keep your Arlo cameras functioning perfectly. Here are a few simple steps to help you keep track of your solar panel’s performance and ensure its longevity:
- Regularly check for debris. Falling leaves, dirt, or any other debris can block sunlight from reaching your solar panel. Periodically clear any obstructions to ensure maximum energy absorption.
- Examine connections: Ensure that all connections between the solar panel, power cable, and camera are secure and free from wear and tear. Loose connections can hinder the panel’s performance and compromise its efficiency.
- Monitor battery life: Keep an eye on your camera’s battery life to ensure it’s charging properly. If you notice any significant decrease in battery life, it may be an indicator of a problem with the solar panel. Investigate and troubleshoot accordingly.
- Clean the solar panel: Over time, dust, dirt, or water spots may accumulate on the surface of your solar panel, hindering its ability to absorb sunlight effectively. Gently clean the panel with a soft cloth or sponge using mild soap and water, ensuring it’s completely dry before reinstalling.
Ensuring Optimal Placement
The positioning of your Arlo solar panel is crucial to allowing it to capture the maximum amount of sunlight. Take note of the following factors when determining the ideal placement:
- South-facing direction: To capture the most sunlight throughout the day, angle your solar panel towards the south if you’re in the northern hemisphere or towards the north if you’re in the southern hemisphere.
- Avoid shading by making sure that no trees, buildings, or other shadow-casting objects are blocking your solar panel. Shading can significantly reduce the efficiency of your solar panel, so choose a location with minimal obstructions.
- Consider high-sunlight areas: If possible, place your solar panel in an area that receives the maximum amount of sunlight throughout the day. Open spaces, rooftops, or areas with direct exposure to the sun are ideal for optimal energy absorption.
Common Issues During Installation And How To Solve Them
If you encounter any of the following issues while installing your Arlo solar panel, refer to the solutions below:
- The solar panel is not charging the battery.
- Ensure that the solar panel is placed in an area where it receives direct sunlight for a significant part of the day. Position it away from obstructions like trees or buildings that may cast shadows on the panel.
- Confirm that the panel is correctly connected to your Arlo camera. Check the cable connections for any loose or damaged connections.
- Verify that the camera is compatible with the Arlo Solar Panel. Some older Arlo camera models may not be compatible.
- The Arlo app or base station does not recognize the solar panel.
- Check if the solar panel’s firmware is up-to-date. Visit the Arlo support website for the latest firmware updates.
- Confirm that your Arlo app is updated to the latest version. An outdated app may not properly recognize the solar panel.
- Restart your base station or camera to see if it resolves the issue. Sometimes, a simple restart can fix connectivity problems.
- The solar panel is not securely attached to the mounting surface.
- Inspect the mounting bracket to ensure it is properly secured to the desired surface. Tighten any loose screws or bolts that may cause instability.
- Check if the mounting surface is suitable for installation. Uneven or unstable surfaces may hinder the secure attachment of the solar panel.
- If needed, use additional hardware like anchors or screws suited for the type of surface you are mounting the solar panel on.
Frequently Asked Questions About Arlo Solar Panel
Here are answers to some commonly asked questions about the Arlo Solar Panel:
| Question | Answer |
| Can I use the Arlo Solar Panel with any Arlo camera? | While most Arlo cameras are compatible with the Arlo Solar Panel, it is important to check the product specifications to ensure compatibility. Some older camera models may not support this accessory. |
| How long does it take to fully charge the Arlo battery using the solar panel? | The charging time depends on various factors, such as the amount of sunlight the solar panel receives, the battery capacity, and the camera’s power consumption. On average, it may take several days to fully charge the battery. |
| Do I need to adjust the solar panel angle? | For optimal charging efficiency, it is recommended to adjust the solar panel angle according to your location and the sun’s position. The Arlo app provides guidance on how to align the solar panel for maximum sunlight capture. |
| Can the Arlo Solar Panel be used indoors? | No, the Arlo Solar Panel is designed for outdoor use. It is weather-resistant and built to withstand various environmental conditions. |
Frequently Asked Questions For How To Install Arlo Solar Panel
Where is the best place to put Arlo’s solar panels?
The best place to put Arlo solar panels is in a location that receives direct sunlight. This ensures optimal charging and maximizes the efficiency of the panels.
How Do You Attach a Solar Panel to an Arlo Camera?
To attach a solar panel to an Arlo camera, follow these steps: 1. Ensure the camera is compatible with solar panels. 2. Purchase a compatible solar panel kit. 3. Connect the solar panel to the camera using the provided cables.
4. Position the solar panel in a sunny location. 5. Ensure the panel is securely attached to the camera for optimal charging.
Why is my Arlo camera not charging with a solar panel?
Arlo’s camera is not charging with a solar panel. Check if the solar panel is properly aligned and receiving sufficient sunlight. Ensure the camera is compatible with the solar panel. Confirm the connection between the camera and panel is secure. Try restarting the camera or using a different solar panel.
Do You Need an Arlo Solar Panel for Each Camera?
No, you do not need an Arlo solar panel for each camera. The Arlo solar panel can be used to power multiple cameras, reducing the need for individual power sources.
Conclusion
In summary, installing an Arlo solar panel for your security camera system is a straightforward process that offers great benefits. Following the step-by-step guide in this blog post, you can effortlessly harness solar energy to power your Arlo cameras.
Not only does this solution save you money on batteries and electricity bills, but it also ensures continuous, uninterrupted surveillance. With the added convenience of no wires and easy setup, the Arlo Solar Panel is a reliable and eco-friendly choice for your home or business security needs.