How to Restore Solar Lights: Easy Fixes for Brighter Nights
To restore solar lights, start by cleaning the panels with a soft cloth and soapy water, then give them a rinse. Next, check the batteries and replace them if necessary.
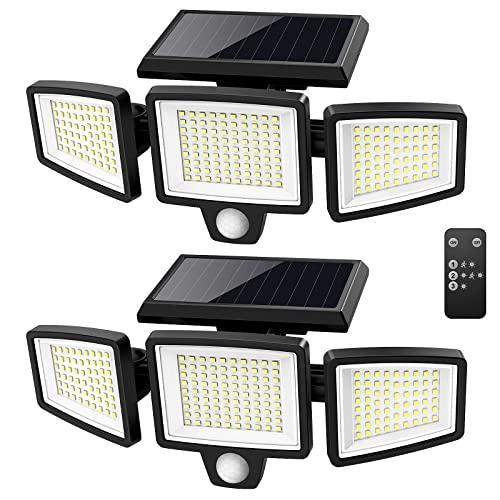
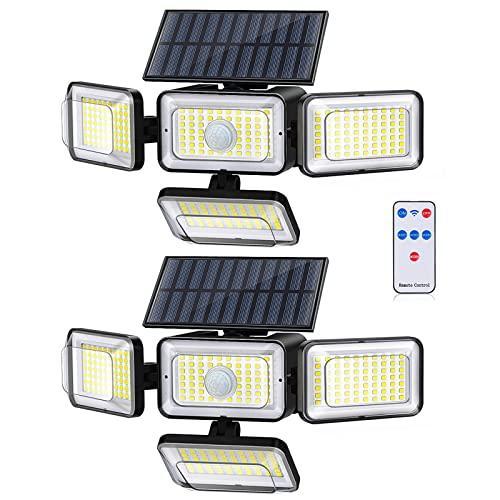
![Solar Outdoor Lights Motion Sensor [138 LED/6 Packs] Solar Security ...](https://lh7-us.googleusercontent.com/rJR1diRrE1vxwq5TWo_JGRHWJrrA51KuwhIGYkbIt5v2fYhXJsmj9wzuC48y90boUwO0cpq4zcXFdtl-JoK4z5jBHTOmKetB7HXHe83v4XudgUaeoU6VlfoXf4fyL-ZhHoJOHKAAhlCAenm77H7SYtE)


Why Solar Lights Lose Their Brightness
Solar lights are a popular and eco-friendly way to illuminate outdoor spaces. However, over time, you might notice that the brightness of your solar lights starts to diminish, leaving you with less effective and less visually appealing lighting. Understanding why solar lights lose their brightness is crucial to restoring their performance and ensuring they continue to light up your outdoor areas effectively. Several factors contribute to the dimming of solar lights, the effects of weather conditions on solar light performance, and the importance of regular maintenance. Let’s dive deeper into each of these aspects.
Factors That Contribute To the Dimming Of Solar Lights
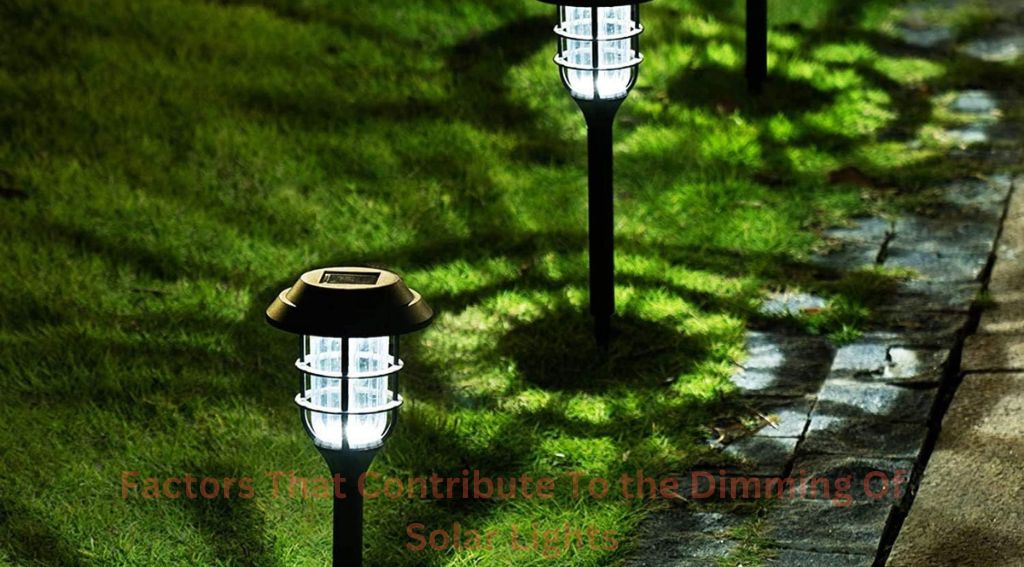
Several factors can contribute to the dimming of solar lights over time. By understanding these factors, you can effectively address the issue and restore brightness to your solar lights. Some of the key factors include:
- Gradual deterioration of solar panels due to constant exposure to sunlight
- Accumulation of dirt, dust, or other debris on the solar panels, which obstructs the absorption of sunlight
- Aging or worn-out rechargeable batteries that are no longer able to store and provide sufficient energy
- Malfunctioning or faulty components, such as the LED bulbs or circuitry
Effects Of Weather Conditions On Solar Light Performance
Weather conditions can significantly impact the performance of solar lights. Extreme temperatures, prolonged exposure to rain or snow, and high humidity levels can all have adverse effects on the efficiency and brightness of your solar lights. For instance, freezing temperatures can cause battery capacity to decrease, resulting in dimmer lighting. Additionally, excessive exposure to rain or humidity can lead to corrosion or damage to the solar panels or other electronic components, further reducing the brightness of the lights.
Importance Of Regular Maintenance
Regular maintenance is crucial for restoring and maximizing the brightness of your solar lights. By incorporating a maintenance routine, you can address the factors that contribute to dimming and ensure that your solar lights continue to perform optimally. Some essential maintenance tasks include the following:
- Cleaning the solar panels regularly to remove any dirt, debris, or obstructions that may hinder sunlight absorption
- Replacing worn-out or defective rechargeable batteries with new ones to ensure sufficient energy storage and output
- Inspecting the LED bulbs and circuitry for any signs of malfunction or damage and replacing them if necessary
- Protecting the solar lights from harsh weather conditions, such as by providing shelter or using weatherproof covers when needed,
By implementing these maintenance practices, you can restore and maintain the brightness of your solar lights, thereby enhancing the ambiance and functionality of your outdoor spaces.
Assessing The Problem
Before you dive into restoring your solar lights, it’s important to accurately assess the problem. This will help you pinpoint the issue and apply the appropriate solution. By following a few simple steps, you can easily diagnose and restore your solar lights to their full brightness. Let’s start by checking the solar panels and their positioning.
1. Checking Solar Panels And Their Positioning
The solar panels are responsible for capturing the sun’s energy and converting it into electricity. Over time, these panels can become dirty or obstructed, preventing them from charging the batteries effectively. To check if your solar panels are the issue,
- Inspect the panels for any dirt, dust, or debris that may be blocking the sunlight. If you spot any, gently clean the panels with a soft cloth or sponge.
- Ensure that the panels are positioned in direct sunlight. They should be facing south if you are in the northern hemisphere, and north if you are in the southern hemisphere.
- Check if there are any objects, such as trees or structures, casting shadows on the panels. If so, adjust their position or trim any overhanging branches to provide maximum sunlight exposure.
2. Evaluating The Condition Of Batteries
The batteries in solar lights are essential for storing the energy that the panels have collected. Over time, these batteries can deteriorate or lose their capacity, leading to dim or non-functional lights. To evaluate the condition of your batteries:
- Remove the batteries from the solar light units.
- Inspect the batteries for any signs of corrosion or leakage. If you notice any, replace the batteries immediately.
- Use a multimeter to test the voltage of the batteries. If the voltage is significantly below the recommended range, consider replacing them with new ones.
3. Inspecting The Led Bulbs
The LED bulbs in solar lights are responsible for illuminating your outdoor space. If they are not working or appear dim, it may be due to a faulty bulb. Here’s how to inspect the LED bulbs:
- Remove the LED bulbs from the solar light units.
- Visually examine the bulbs for any signs of damage or discoloration. If they are visibly worn or broken, replace the bulbs.
- If the bulbs appear to be in good condition, use a multimeter to test their continuity. If the reading shows no continuity, it indicates a faulty bulb that needs replacement.
By following these simple steps, you will be able to diagnose the issues with your solar lights accurately. Once you have identified the problem, you can proceed with the appropriate steps to restore their functionality and enjoy the warm glow they provide.
Easy Fixes For Solar Lights
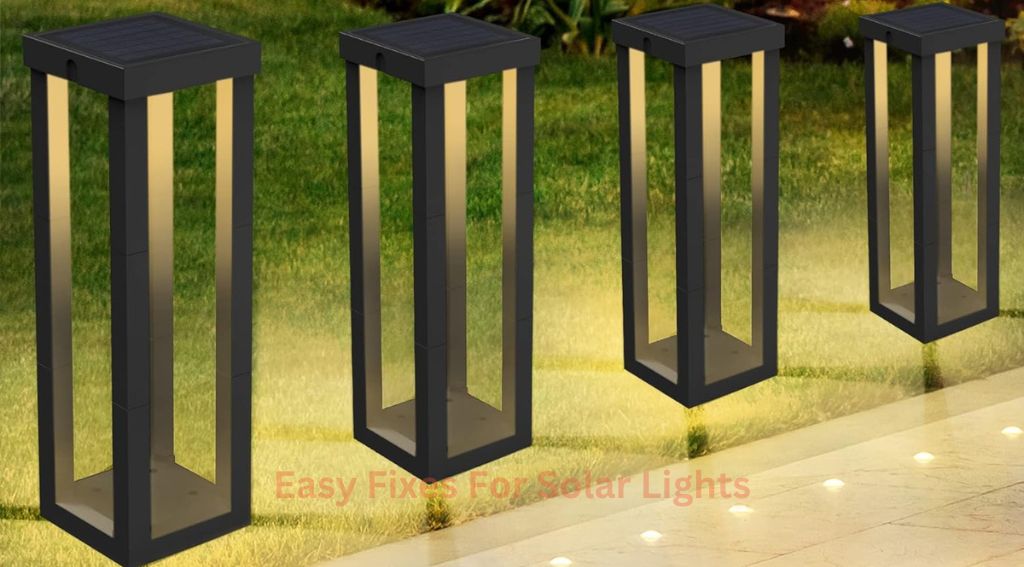
Solar lights are a great way to illuminate your outdoor space while minimizing energy consumption. However, over time, these lights may experience some issues that affect their performance. The good news is that many common problems can be easily fixed, allowing you to restore the functionality of your solar lights without much hassle. In this article, we will discuss three easy fixes for solar lights: cleaning the solar panels, replacing old batteries, and upgrading to higher-capacity rechargeable batteries. Let’s dive in and see how these simple solutions can bring your solar lights back to life.
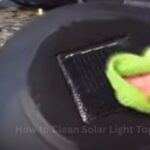
How to Clean Solar Light Panel
Cleaning The Solar Panels For Improved Efficiency
One of the most common reasons for solar lights not functioning properly is dirty solar panels. The accumulation of dirt, dust, and other debris on the surface of the panels can block sunlight and reduce the efficiency of the lights. To address this issue, regular cleaning is crucial. Here’s how you can clean your solar panels:
- Gently remove the solar lights from their stakes or mountings.
- Use a soft cloth or sponge dipped in a mild soap-water solution to wipe the surface of the solar panels.
- Rinse the panels with clean water and dry them thoroughly before reinstalling the lights.
By ensuring clean solar panels, you allow maximum sunlight to reach the photovoltaic cells, which in turn boosts the charging and performance of your solar lights.
Replacing Old Batteries With New Ones
As time goes by, the batteries powering your solar lights can start to lose their capacity. Dim lights or lights that don’t turn on at all are often indicators of battery degradation. To address this issue, it’s important to replace the old batteries with new ones. Here’s the process:
- Locate the battery compartment of your solar lights. It is usually found beneath the solar panel or inside the light housing.
- Remove the old batteries from their slots, paying attention to their polarity (+/-).
- Insert the new batteries with the correct polarity, ensuring a snug fit.
- Close the battery compartment securely.
By replacing old batteries, you can provide your solar lights with a fresh and reliable power source, enhancing their performance and longevity.
Upgrading To Higher-capacity Rechargeable Batteries
If you find that your solar lights require frequent battery replacements or lack sufficient power to operate for an extended period, it might be time to consider upgrading to higher-capacity rechargeable batteries. These batteries have a larger storage capacity, allowing them to store more energy from the sun and provide longer-lasting illumination. To upgrade your solar lights with higher-capacity rechargeable batteries:
- Follow the same steps as mentioned earlier to locate and remove the old batteries.
- Purchase rechargeable batteries with a higher mAh (milliamp-hour) rating that is compatible with your solar lights.
- Insert the new batteries with the correct polarity, ensuring a snug fit.
- Close the battery compartment securely.
By upgrading to higher-capacity rechargeable batteries, you’ll be able to enjoy brighter and longer-lasting illumination from your solar lights, making them more reliable and efficient.
How to Install Solar Outdoor Lights
By implementing these easy fixes for your solar lights, you can restore their functionality and maximize their performance. Remember to regularly clean the solar panels, replace old batteries, and consider upgrading to higher-capacity rechargeable batteries when needed.
Repair Techniques For Solar Lights
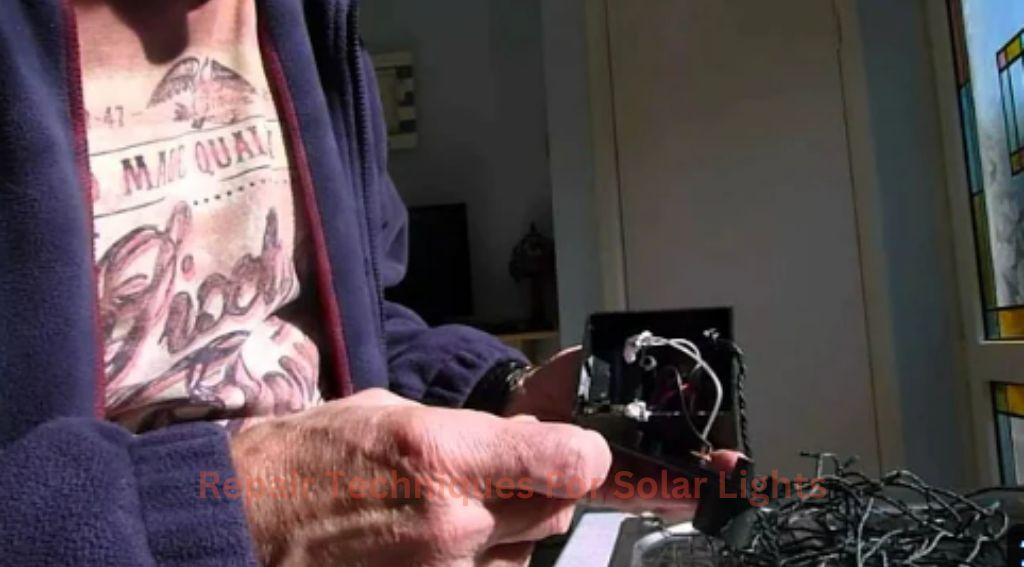
Solar lights are an excellent eco-friendly option for lighting up your yard or garden. However, just like any other electronic device, they can experience issues over time. Instead of replacing them, why not try out some repair techniques to get them back in working order?
Where to Find Solar Christmas Lights
In this article, we will explore step-by-step instructions and DIY troubleshooting tips to help restore your solar lights. Read on to find out how you can easily fix loose wires, replace faulty LED bulbs, repair corrosion and water damage, and troubleshoot common issues.
Step-by-step Guide To Soldering Loose Wires
If you notice your solar lights are flickering or not working at all, loose wires may be the culprit. Fortunately, soldering them back into place is a relatively simple process. Here’s a step-by-step guide to help you:
- First, gather the necessary supplies: a soldering iron, solder wire, flux, heat-shrink tubing, and a wire stripper.
- Identify the loose wires by inspecting the connections in the solar panel or the light fixture itself.
- Use the wire stripper to carefully remove the insulation from the ends of the loose wires.
- Apply a small amount of flux to the exposed wire ends to ensure better soldering.
- Heat the soldering iron and touch it to the wire ends to melt the solder wire onto them.
- Once the solder is melted, remove the soldering iron and allow the joint to cool.
- Finally, cover the soldered joint with heat-shrink tubing and use a heat gun to shrink it into place, providing insulation and protection.
Replacing Damaged Or Faulty LED bulbs
A common issue with solar lights is a burnt-out or faulty LED bulb. Replacing the bulb can easily resolve this problem. Here’s what you need to do:
- Locate the LED bulb compartment on your solar light.
- Remove any screws or clips securing the compartment.
- Take out the old LED bulb by gently pulling it out or unscrewing it, depending on the design.
- Insert the new LED bulb into the compartment, ensuring it fits securely.
- If necessary, reattach any screws or clips to secure the compartment back in place.
- Turn on your solar light to check if the new bulb is working properly.
Fixing Corrosion And Water Damage
Solar lights are exposed to the elements, making them susceptible to corrosion and water damage. If you notice signs of rust or water inside your lights, follow these steps to repair them:
- Start by removing any batteries or electrical connections from the solar lights.
- Inspect the components for signs of corrosion. Use a small wire brush or sandpaper to gently remove the rust and restore the surface.
- If there is water inside the solar light, leave it in a dry place for a few days to allow it to evaporate. Alternatively, you can use a hairdryer on a low setting to accelerate the drying process.
- After the light and components are dry, reassemble the solar light and reconnect any wires or batteries.
- Test the repaired solar light by placing it in direct sunlight and ensuring it charges and illuminates properly.
DIY Troubleshooting Tips For Common Issues
If your solar lights are still not functioning correctly after trying the above repair techniques, here are a few additional troubleshooting tips to help identify and fix common issues:
- Make sure the solar panel is positioned to receive adequate sunlight.
- Clean the solar panel regularly to remove any dust or debris that may be blocking the sunlight.
- Check the batteries and replace them if necessary.
- Inspect the light sensor and adjust it if needed to ensure it is not being obstructed.
- Verify that the switch or control buttons are in the correct position.
Tips For Long-term Maintenance
Maintaining and caring for your solar lights is crucial to ensuring their optimal performance and longevity. By following these tips for long-term maintenance, you can enjoy the benefits of well-illuminated outdoor spaces and make the most out of your solar lights.
Regular Cleaning And Checking For Debris
Regular cleaning of solar lights is essential to keeping them in good working condition. Over time, dust, dirt, and other debris can accumulate on the solar panels, decreasing their efficiency. To clean your solar lights, follow these simple steps:
- Turn off the solar lights and detach them from their stakes or poles.
- Gently wipe the solar panels with a clean cloth or sponge to remove any dirt or grime.
- Inspect the lights for any signs of damage, loose connections, or worn-out parts. Replace any faulty components to ensure the proper functioning of your solar lights.
- Reassemble the lights and place them back in their desired location.
By regularly cleaning your solar lights and checking for debris, you can maintain their efficiency and brightness, guaranteeing a well-lit outdoor space.
Seasonal Maintenance To Maximize Performance
Seasonal maintenance plays a vital role in maximizing the performance of your solar lights throughout the year. Here are some important tasks to consider:
- Adjust the position and angles of the solar panels to align with the changing position of the sun during different seasons.
- Trim any overgrown vegetation that may obstruct sunlight from reaching the solar panels.
- Replace any worn-out batteries with new ones to ensure optimal energy storage. Remember to dispose of the old batteries properly.
- Ensure that the lights remain exposed to direct sunlight for the recommended amount of time.
By performing seasonal maintenance tasks, you can make the most of your solar lights, keeping them bright and functional throughout the year.
Protecting Solar Lights From Extreme Weather Conditions
Extreme weather conditions can significantly impact the performance and lifespan of solar lights. To protect your solar lights from any weather-related damage, consider taking the following precautions:
- During heavy rain, ensure that the solar lights are properly waterproofed and seal any gaps or cracks that may allow water to seep in.
- In snowy conditions, regularly remove snow accumulation from the solar panels to maintain their efficiency.
- If strong winds are expected, temporarily relocate or secure the solar lights to prevent them from toppling over or sustaining damage.
By safeguarding your Restore Solar Lights from extreme weather conditions, you can prolong their lifespan and continue to enjoy their benefits for a long time.
Enhancing The Lifespan Of Solar Lights Through Proper Care And Storage
In addition to regular cleaning and seasonal maintenance, proper care and storage can significantly enhance the lifespan of your solar lights. Here are some tips:
- Store your solar lights in a cool, dry place during extended periods of non-use, such as the winter months or when you are away on vacation.
- Remove the batteries before storing the lights to prevent any potential leakage or corrosion that may damage the lights.
- Keep the original packaging or use protective covers to shield the solar lights from dust, moisture, or any physical damage.
By taking proper care and storage measures, you can ensure that your solar lights remain in excellent condition and provide optimal illumination whenever you need them.
Frequently Asked Questions: How To Restore Solar Lights
How do you clean cloudy solar lights?
To clean cloudy solar lights, first remove the solar panel. Then, wipe the light cover and solar panel with a damp cloth and mild detergent. Rinse and dry the parts thoroughly before reassembling them. Avoid using abrasive cleaners or scrubbing vigorously to prevent damage.
Does clear nail polish work on solar lights?
Yes, clear nail polish can work on solar lights. It helps protect the surface from fading and damage caused by exposure to the sun. Applying a thin coat of clear nail polish can prolong the lifespan of your solar lights and keep them looking new.
What causes solar lights to stop working?
Solar lights may stop working due to dead batteries, loose connections, faulty wiring, or a lack of direct sunlight.
Can you use Wd40 to clean solar panels?
No, WD40 should not be used to clean solar panels. It can leave residue and potentially damage the panels, reducing their efficiency. Instead, use a soft cloth or sponge with water and mild, non-abrasive soap to gently clean the surface of the panels.
Conclusion
Restoring solar lights is a straightforward process that can prolong their lifespan, save money on replacements, and contribute to a greener environment. By following the steps outlined in this guide, including cleaning the solar panels, replacing batteries, and checking the wiring connections, users can easily bring their solar lights back to life.
So don’t give up on your solar lights just yet; try these simple restoration techniques and enjoy their bright and sustainable benefits for years to come.