How to Connect Solar Panel Inverter And Battery?
To connect a solar panel inverter and battery, you need to follow specific steps. In this guide, we will walk you through the process, ensuring a smooth connection that allows the battery to be charged using solar energy.
By understanding the correct wiring and connections, you can optimize your solar panel system’s efficiency and enjoy its benefits. So, let’s get started and learn how to connect a solar panel inverter and battery.
Understanding The Basics: Solar Panel Inverter And Battery
A critical aspect of any solar power system is the connection between the solar panel inverter and the battery. This connection is essential for the efficient and effective utilization of solar energy. In this article, we will explore the basics of these components and how they work together to power your home or business with clean energy.
How to Connect Solar Inverter to Breaker Box
Overview Of Solar Panel Inverters
What is a solar panel inverter?
A solar panel inverter is a key component of a solar power system that converts the DC (direct current) electricity generated by solar panels into AC (alternating current) electricity that can be used to power your home or business. With an inverter, you can supply excess energy back to the grid and effectively reduce your energy bills through net metering.
Types of solar panel inverters:
There are several types of solar panel inverters available, catering to different needs and requirements. Some common types include:
- String inverters: These inverters are the most common and affordable option. They are suitable for residential use and require all solar panels in a string to operate at the same level of efficiency.
- Microinverters: These inverters are installed on each individual solar panel and ensure that each panel operates independently. They are ideal for installations with shading or panels facing different directions.
- Hybrid inverters: These inverters integrate battery storage, allowing you to store excess energy and use it during times of low solar generation or power outages.
- Grid-tied inverters: These inverters allow you to connect your solar power system to the grid, making it possible to export excess energy and receive credits or payments from your utility company.
Overview Of Solar Panel Batteries
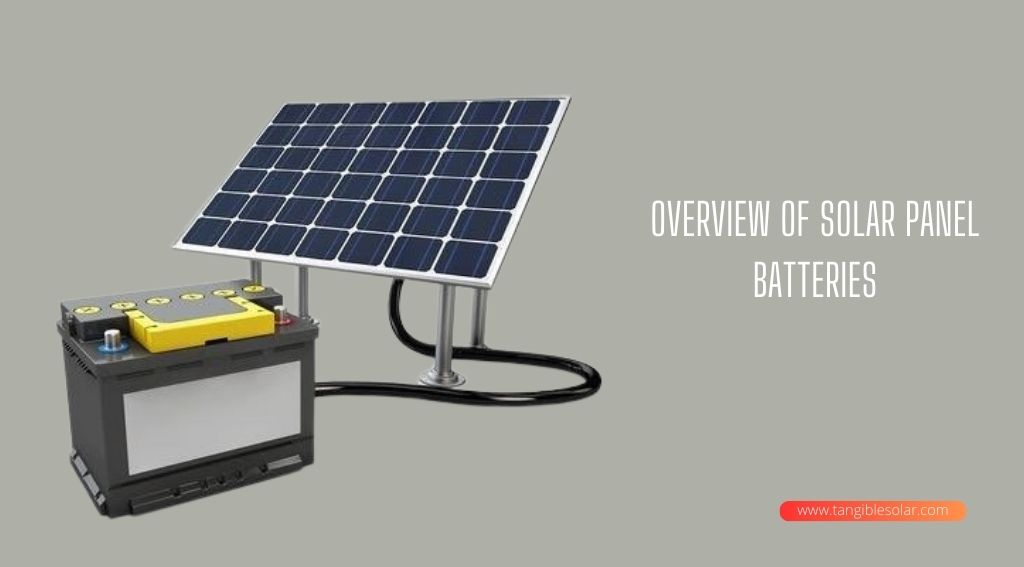
Why do you need a solar panel battery?
If you want to store the extra energy your solar panels produce for later use, solar panel batteries are a necessity. With a battery, you can ensure a stable power supply during periods of low solar generation or during power outages, making your solar power system more reliable and resilient.
How Many Solar Panels for 3000 Watt Inverter
Types of solar panel batteries:
There are various types of solar panel batteries available, each with its own advantages and disadvantages.
| Battery Type | Advantages | Disadvantages |
| Lead-acid batteries | Low upfront cost, widely available | Requires regular maintenance and has a shorter lifespan compared to other types |
| Lithium-ion Batteries | Long lifespan, high energy density, low maintenance | Higher upfront costs |
| Saltwater Batteries | Non-toxic, long lifespan | Higher upfront costs and lower energy density |
Selecting The Right Inverter And Battery Combination
When it comes to connecting a solar panel inverter and battery, selecting the right combination is crucial for the successful functioning of your solar power system. Together, the inverter and battery transform the DC power that the solar panels produce into usable AC power for your home or business. To ensure maximum efficiency and long-term performance, it’s important to consider a few key factors when choosing the inverter and battery combination.
Factors To Consider When Choosing An Inverter And Battery
1. Power Output: The power output of the inverter is an important consideration as it determines the maximum amount of AC power that can be supplied to your electrical appliances. It’s essential to select an inverter with a power output that matches the energy demands of your property.
2. Battery Capacity: The capacity of the battery is measured in kilowatt-hours (kWh) and indicates how much energy it can store. Consider the amount of energy you need to store during periods of low sunlight or high energy consumption. A larger battery capacity ensures longer backup power during adverse conditions.
3. Voltage Compatibility: Ensure that the voltage ratings of both the inverter and battery are compatible with each other. Mismatched voltages can lead to compatibility issues and affect the overall performance of your solar power system.
4. Efficiency: Look for inverters and batteries that have high-efficiency ratings. High-efficiency equipment will convert a larger percentage of solar energy into usable power, reducing energy losses and maximizing overall system performance.
Matching The Inverter And Battery Specifications
Once you have considered the important factors, it’s essential to ensure that the specifications of the inverter and battery are matched appropriately. This requires checking the technical details and specifications provided by the manufacturers.
Check the inverter’s input voltage range and compare it with the battery’s voltage output to ensure compatibility. Additionally, verify the maximum power output of the inverter and ensure it meets the requirements of your property’s energy consumption.
The battery’s capacity must align with the power output of the inverter to ensure a seamless and efficient flow of power. Remember, an inverter and battery combination that is not properly matched can result in decreased system performance and potential damage to the equipment.
Step-by-step Guide To Connecting a Solar Panel Inverter And Battery
Connecting your solar panel inverter and battery is an essential step in setting up your solar panel system. This step-by-step guide will walk you through the process, ensuring you make the proper connections and considerations along the way. By following these instructions, you can ensure that your solar panel system is efficiently converting solar energy into usable electricity for your home or business. Let’s get started!
Installing The Solar Panel System
Before getting into the specifics of connecting the inverter to the battery, it’s important to have a properly installed solar panel system. Here are the steps to follow:
- Choose the location for your solar panels. Ideally, it should be a spot that receives ample sunlight throughout the day.
- Mount the solar panels securely onto a roof or ground-mounted structure.
- Position each panel at the optimal angle for maximum sunlight exposure. This angle typically corresponds to your geographic latitude.
- Securely fasten all electrical connections, ensuring they are weatherproof.
- Connect the solar panels in series or parallel, depending on the voltage and current requirements of your system.
- Install a solar charge controller to regulate the charging process of the battery.
Connecting The Inverter To The Battery
Now that your solar panel system is installed, it’s time to connect the inverter to the battery. Follow these steps:
- Locate the positive and negative terminals on the inverter and battery.
- Ensure the inverter and battery are turned off and disconnected from any power sources.
- Connect the positive terminal of the battery to the positive terminal of the inverter using appropriately sized cables.
- Connect the negative terminal of the battery to the negative terminal of the inverter using the appropriate cables as well.
- Double-check all connections to ensure they are secure and tight.
- Turn on the inverter and check for any error messages or warnings.
Important Considerations During The Connection Process
While connecting the solar panel inverter and battery, it’s important to keep the following considerations in mind:
- Make sure the cables used for the connections can handle the current and voltage levels of your system. Using undersized cables can result in power loss and an increased risk of overheating.
- Always follow the manufacturer’s instructions and guidelines when connecting the components together. This will ensure proper compatibility and efficient operation of your system.
- Consider using protective devices such as fuses or circuit breakers to prevent electrical hazards in case of any malfunction or overload.
- Regularly monitor and inspect the connections for any signs of damage or loose connections. This will help prevent any potential issues and ensure the longevity of your solar panel system.
Congratulations! You have successfully connected your solar panel inverter and battery. By following this step-by-step guide and considering the important factors, your solar panel system is now ready to generate clean and renewable energy for your home or business. Enjoy the benefits of solar power and contribute to a greener future!
Best Practices For Efficient Connection
Efficiently connecting a solar panel inverter and battery is crucial for maximizing energy conversion efficiency, ensuring proper wiring and insulation, and implementing safety measures. By following these best practices, you can optimize the performance of your solar power system and enhance its longevity.
Maximizing Energy Conversion Efficiency
Maximizing energy conversion efficiency is essential for harnessing the full potential of your solar power system. Here are some best practices to follow:
- Choose the right inverter. Select an inverter that suits your specific project requirements, taking into consideration factors such as system size, panel configuration, and load demand.
- Optimize solar panel orientation: Place your solar panels so that they receive the most sunlight possible throughout the day, making sure that no trees, buildings, or other obstructions are blocking their view.
- Regularly clean and maintain panels: Keep your solar panels clean and free from dirt, dust, or debris to maximize their efficiency. Perform regular maintenance checks to identify and fix any issues promptly.
- Monitor system performance: Install a monitoring system to keep track of your solar power system’s performance. This will allow you to identify and address any inefficiencies or problems that arise.
Ensuring Proper Wiring And Insulation
Proper wiring and insulation are crucial for maintaining the safety and functionality of your solar power system. Consider the following practices:
- Use quality wiring materials: Ensure that you use high-quality wiring and cables specifically designed for solar applications. This will minimize power loss and reduce the risk of electrical hazards.
- Follow the installation guidelines: Adhere to the manufacturer’s instructions and local electrical codes when installing the wiring for your solar power system. This includes using the correct wire gauge, proper grounding techniques, and following safety precautions.
- Properly label and organize cables: Clearly label and organize all cables, making it easier to troubleshoot and maintain the system in the future. Use color coding or tags to identify positive and negative connections.
- Implement proper insulation. Insulate exposed wiring to protect against weather conditions and potential damage. Use approved conduit and appropriate insulation methods to safeguard against electrical shock hazards.
Implementing Safety Measures
When dealing with any electrical system, safety should always be a top priority. Here are some safety measures to consider:
- Work with a qualified professional: If you lack the necessary expertise, it is advised to hire a professional electrician or solar installer to carry out the connection process. They have the knowledge and experience to ensure a safe and effective installation.
- Turn off the power: Before making any connections or modifications, ensure that the electrical power to the system is switched off. This will prevent electrical shocks and other accidents.
- Protect against overcurrent: Install appropriate fuses, breakers, or other protective devices to prevent overcurrent and short circuits. This will safeguard your system from potential damage.
- Regularly inspect and maintain: Schedule routine inspections and maintenance checks for your solar power system. This will help identify any potential safety hazards or issues that need to be addressed.
By following these best practices for efficient connection, you can optimize the performance, reliability, and safety of your solar panel inverter and battery. Enhancing energy conversion efficiency, ensuring proper wiring and insulation, and implementing safety measures will contribute to the long-term success of your solar power system.
Troubleshooting Common Issues
Connecting your solar panel inverter and battery is an essential step in harnessing the power of solar energy. However, like any complex electrical system, it is not without its challenges. In this section, we will discuss common issues that you may encounter during the connection process and provide solutions to help you troubleshoot and resolve them.
Identifying And Resolving Connection Problems
If you find yourself facing connection problems between your solar panel inverter and battery, don’t panic. These issues can often be resolved with some careful inspection and troubleshooting. Here are a few steps you can take:
1. Check the cables
One of the most common causes of connection problems is loose or damaged cables. Start by examining the cables for any visible signs of wear or damage. Ensure that all connections are secure and tight. If you notice any issues, replace the cables with new ones suitable for your system.
2. Verify correct polarity
Incorrect polarity can lead to poor performance or even damage to your solar panel inverter and battery. Check that the positive and negative terminals are properly aligned with their corresponding counterparts. Use a multimeter to confirm the polarity, if needed.
3. Test the connections
Perform a thorough test of all connections in your system. Ensure that each wire is securely connected to the appropriate terminal. Use a voltage meter to measure the voltage at each connection point to identify any potential issues.
Dealing With Performance Issues
If your solar panel inverter and battery are connected correctly but you are experiencing performance issues, there are a few possible causes to consider:
1. Insufficient sunlight
One of the most common reasons for performance issues is insufficient sunlight reaching your solar panels. Check for any obstructions or shading that may prevent the panels from receiving optimal sunlight. If necessary, reposition the panels to maximize exposure to the sun.
2. Battery capacity
Your battery’s capacity may affect the overall performance of your system. Check that your battery is properly sized for your energy needs and that it is in good condition. If necessary, consider upgrading to a higher-capacity battery to improve the system’s performance.
3. Inverter settings
Review the settings on your solar panel inverter to ensure they are optimized for your specific requirements. Consult the inverter’s user manual or contact the manufacturer for guidance on adjusting settings such as voltage and frequency.
By following these troubleshooting steps, you can resolve common connection problems and enhance the performance of your solar panel inverter and battery system. Remember to consult a professional if you encounter any issues that you are unsure how to address.
FAQs: How To Connect Solar Panel Inverter And Battery
Can a solar panel and an inverter both charge a battery at the same time?
Yes, solar panels and inverters can charge batteries simultaneously.
What Happens If You Connect a Solar Panel Directly to a Battery?
Connecting a solar panel directly to a battery can cause overcharging and damage. The battery needs a charge controller to regulate the flow of energy and prevent damage. It’s important to use proper equipment for a safe and efficient solar panel setup.
How to Connect a Solar Panel Charge Controller and Inverter
To connect a solar panel charge controller and inverter, follow these steps: 1. Connect the positive and negative terminals of the solar panel to the charge controller’s solar input. 2. Connect the charge controller’s battery terminals to the battery bank. 3.
Connect the inverter’s positive and negative terminals to the battery terminals. 4. Ensure all connections are secure and properly tightened. 5. Test the system to ensure it is functioning correctly.
How Do You Connect A Solar Panel Inverter And Battery?
To connect a solar panel inverter and battery, first, ensure that the inverter’s input voltage matches the battery voltage. Then, connect the positive terminal of the battery to the positive input of the inverter and the negative terminal of the battery to the negative input of the inverter.
Finally, secure the connections and ensure proper grounding for safety.
Conclusion
To effectively connect your solar panel inverter and battery, it is crucial to follow the right steps and ensure proper compatibility between the two components. By understanding how to connect them correctly, you can maximize the efficiency of your solar power system and fully harness the benefits of clean energy.
Remember to consult the manufacturer’s guidelines and seek professional assistance if needed. With the right knowledge and approach, you can seamlessly integrate and optimize your solar panel inverter and battery for a sustainable and cost-effective energy solution.