How to Reset Solar Lights: A Step-by-Step Guide
Turn off the solar lights and disconnect them before removing the batteries and waiting 10 to 15 minutes before reinserting them and reconnecting the solar panel. This helps to reset the internal circuitry and restore the functionality of the lights.
To begin, resetting solar lights can be a simple solution to problems such as lights not going on or staying on for long periods of time. Solar lights use the power of the sun to charge their batteries, making them an energy-efficient and cost-effective solution to brighten outdoor areas.
However, as with any technological equipment, they may develop issues with time. Resetting the solar lights can often cure common problems and restore their functionality. We will go over how to reset solar lights and troubleshoot any issues that may arise. You may extend the life and effectiveness of your solar lights by following these instructions.
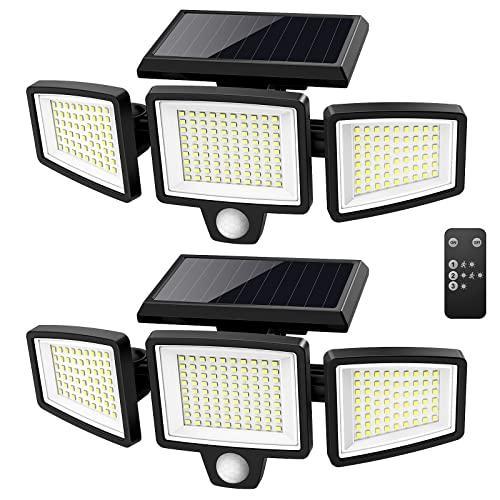

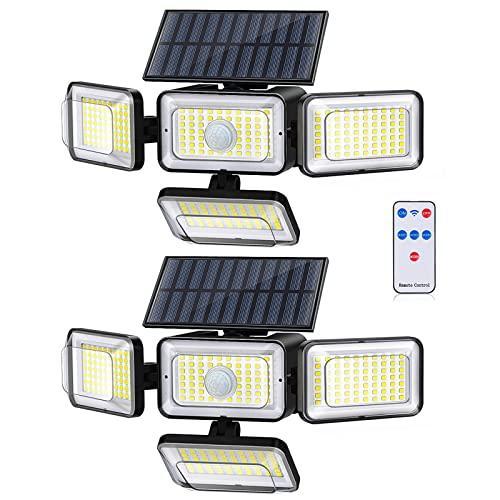
![Solar Outdoor Lights Motion Sensor [138 LED/6 Packs] Solar Security ...](https://lh7-us.googleusercontent.com/s9kko97evG5fY1fAZKNEoblliPvldPBGh4nuRMAyFWQSxmbsWead7dncQc9DnxDmnh-YvGNJvhkDBd2vLqvOi3K6BH8BQgzHOAnhT255Ll2WsgEvXHfljWNjZIFoZ14vqYDkRtrHvbGgQ8xN7vb8Sqg)
Reasons For Resetting Solar Lights
Follow these simple steps to reset solar lights. First, turn off the lights and clear any obstacles. Allow the lights to recharge for 48 hours in direct sunlight. Finally, return the lights to their original brightness.
How To Make Solar Lights Stay On Longer
Solar lights are a cost-effective and environmentally friendly solution to brighten outdoor areas. However, they may need to be reset for a variety of reasons over time. Understanding these causes can assist you in troubleshooting and restoring the performance of your solar lights. The three most prevalent causes for resetting solar lights are as follows:
Sunlight Overexposure:
Excessive sunshine can hurt the functioning of solar lights. A few things to think about are as follows:
- Direct sunlight: Solar lights should preferably be placed where they receive at least 8–10 hours of direct sunshine per day.
- shady areas: If you set your solar lights in a shady area, they may not receive enough sunshine, resulting in a shorter battery life.
- Obstructions: Make sure there are no obstacles, such as trees, buildings, or other items, that could cast shadows on your solar lights.
Overexposure issues can be addressed by resetting your solar lights, allowing them to resume optimal functioning.
Drainage of the battery:
Solar lights require efficient battery power to perform effectively. The following are some of the reasons that can lead to battery drain:
- Old batteries: Rechargeable batteries in solar lamps may lose their ability to hold a charge over time. As a result, performance may suffer, and operation hours may be restricted.
- Inadequate sunlight: Inadequate sunlight exposure can hinder batteries from fully charging, resulting in rapid drain.
- Winter months: Shorter sunshine hours and cloudy weather conditions can impair the battery’s ability to charge during the winter fully.
You may alleviate battery drainage difficulties by resetting your solar lights, boosting their overall performance and longevity.
Sensors that are not working properly:
Solar lights frequently use built-in sensors that detect variations in ambient light levels. However, faulty sensors can impair their performance. Think about the following:
- Dirt and debris: Dirt, dust, or leaves can clog the light sensors and prevent them from working properly. Cleaning them completely may help solve the problem.
- Incorrect settings: If your solar lights have changeable sensitivity or duration settings, double-check that they are set appropriately.
- Sensor positioning: Ensure that the sensors are not obscured or covered, as this can impair their capacity to detect light changes.
Resetting your solar lights can help to recalibrate the sensors and restore efficient operation, ensuring that they respond appropriately to ambient light conditions.
Remember that understanding the reasons for resetting solar lights will assist you in troubleshooting and resolving frequent issues. By handling these elements effectively, you may improve the performance and longevity of your solar lights, as well as their illumination and energy efficiency.
Solar Light Evaluation
Resetting solar lights is a necessary step in determining their functionality. Follow these simple guidelines to get the most out of your solar lighting systems.
Solar lights are an excellent method to illuminate your outdoor spaces while conserving energy. However, they may need to be reset or repaired over time to ensure optimal functioning. Before you begin the process of resetting solar lights, you need to first analyze the present state of your solar lights.
Do Solar Lights Need Direct Sunlight
This will assist you in identifying any potential problems that may need to be addressed. Here are some basic steps to evaluating your solar light:
Examine for physical damage:
- Examine the general condition: Inspect the solar light carefully for any evident evidence of physical deterioration, such as cracks, dents, or loose components. Physical damage can impair the light’s functionality; therefore, it’s critical to fix these issues before proceeding with the reset.
- Examine the solar panel: The solar panel is an important component of solar lighting since it receives sunlight and converts it to electricity. Examine the solar panel for fractures, scratches, or dirt accumulation that could interfere with its capacity to generate power.
- Check for loose or disconnected wires. Loose or disconnected wires might impair the flow of power, preventing the solar light from functioning properly. Check for any loose wires and carefully reconnect them if necessary.
Examine the solar panel.
- Ensure good positioning: To receive the most sunshine, solar panels must be properly positioned. Examine the positioning of the solar panel and make any necessary adjustments to maximize exposure to the sun’s rays.
- Clean the solar panel: Dirt, dust, and debris can build up on the solar panel over time, lowering its effectiveness. To guarantee optimal light absorption, gently clean the panel’s surface using a gentle cloth or sponge.
Battery Examination:
- Remove and recharge the batteries: If the batteries in your solar light are removable, remove them and recharge them using an acceptable charging method. This will help to guarantee that the batteries are fully charged and have enough juice to power the light.
- Examine the battery connections: Examine the battery connections within the solar lamp to ensure they are clean and securely fastened. Corroded or loose connections might impair the performance of the battery.
- Replace old batteries: If the batteries are old or no longer hold a charge, think about replacing them. Fresh batteries are required for solar lights to operate properly.
You’ll be more equipped to reset and potentially fix any difficulties that develop if you analyze the condition of your solar light, look for physical damage, verify the solar panel, and test the batteries. This guarantees that your solar light continues to properly and effectively illuminate your outside space.
Reset Preparation
Resetting solar lights is simple and necessary for proper operation. Follow these simple procedures to guarantee that your solar lights are working properly and efficiently.
Turn off the solar light.
To begin the process of resetting your solar lights, turn them off first. This guarantees that no power is applied to the lights during the reset procedure. Locate and deactivate the solar light’s switch or button.
Take out the batteries.
After turning off the solar light, the batteries must be removed. Removing the batteries will reset the internal system of the lamp. Carefully open the container containing the batteries and remove them. Make certain that the batteries are handled appropriately and that they are disposed of in line with local rules, if applicable.
Solar panel cleaning:
Dirt or debris on the solar panel is one of the most common causes of solar lights not operating properly. Cleaning the solar panel will help improve the functioning of the light. Here’s how to go about it:
- First, inspect the solar panel for any obvious dirt or debris.
- Gently clean the surface of the solar panel with a soft cloth or sponge.
- If there are stubborn stains or buildup, combine a mild detergent with water and scrub the panel gently with a soft brush.
- Rinse the solar panel with clean water to eliminate any cleaning product residue.
- Allow the solar panel to thoroughly dry before continuing.
By completing these steps and making sure the solar panel is clean, you are laying the groundwork for a successful solar light reset.
The Solar Light Must Be Reset
Follow these simple procedures to reset solar lights: 1. Remove any batteries from the solar light and turn them off. 2. Turn off the light for 48 hours to let the internal memory reset. 3. Replace the batteries and turn on the light.
Why Is There An On Off Switch On Solar Lights
Your solar light has been reset and is now ready to use.
Restoring Sensor Settings:
Due to faulty sensor settings, solar lights may not perform as efficiently as they should. Resetting these settings can help them perform at their best again. Here’s how to go about it:
- Remove any obstructions: examine the sensor for any objects or debris that may be blocking it. Its sensitivity can be improved by removing any physical impediments.
- Adjust the sensor angle: Make sure the solar light sensor is pointing in the appropriate direction to get the most sunlight exposure. Tilt and change the angle as needed to enhance its performance.
- Toggle the switch: In some circumstances, toggling the solar light’s power switch will reset the sensor settings. Turn it off and on again to see if it solves the problem.
- Examine the sensitivity settings. Some solar lamps include sensitivity settings that can be adjusted. If your light has this feature, experiment with changing the settings to see if it improves its performance.
How to Reset the Battery Connection:
Resetting the battery connection may help if your solar light is not turning on or the brightness is drastically lowered. Take the following steps:
- Turn off the solar light. Begin the process by turning off the light.
- Locate and carefully open the battery compartment. Locate and carefully open the battery compartment. If necessary, remove the batteries.
- Clean the battery contacts: To clean the battery contacts, use a soft cloth or a cotton swab bathed in rubbing alcohol. This aids with the removal of any debris or corrosion that may be impeding the battery’s performance.
- Replace the batteries: Replace the batteries in the battery compartment, making sure they are properly inserted. Securely close the compartment.
- Turn on the solar light. Turn on the solar light to see if the reset fixed the problem. It should now be fully operational.
Using the Timer Function:
If your solar light has a timer and you detect uneven or erroneous timing, restarting the timer can help. Here’s how to go about it:
- Locate the timer button: Your solar light may have a separate timer button or a set of buttons to access the timer function, depending on the model. Look for the relevant button(s).
- Press and hold the timer button. For a few seconds, press and hold the timer button until the timer settings screen or indicator appears.
- Reset the timer: Using the corresponding buttons, change or reset the timer settings to your liking. If necessary, follow the instructions in the user handbook.
- Save the changes. Once you’ve selected the desired timing settings, save them by hitting the appropriate button or following the on-screen instructions.
- Check the timer function. To check that the reset was successful, monitor the solar light’s behavior during the time intervals specified. It should now run by the new timer settings you’ve set.
Remember that resetting the sensor settings, battery connection, and timer function of your solar lights can often resolve common issues. By following these simple procedures, you can get the most out of your solar lights and extend their lives.
Putting The Solar Light Back Together
It is simple to reset solar lights. First, turn off the lights and remove the batteries. After that, place them in a dark spot for 48 hours to completely discharge. Finally, replace the batteries and turn on the lights.
Have fun with your reassembled solar light!
After you’ve successfully reset your solar light, it’s time to reassemble the individual components to restore their performance. Inserting the batteries, shutting the battery compartment, and repositioning the solar panel are all steps in the procedure. To ensure a seamless reassembly, follow the steps below:
Placing the batteries:
- Remove the top or slide it off the battery compartment.
- Double-check the polarity, making sure the positive (+) and negative (-) ends line up with the marks on the battery compartment.
- Insert the batteries one at a time, following the polarity instructions.
- Once all of the batteries have been installed, double-check that they are snugly fitted.
- Keep in mind that using fresh, fully charged batteries is critical for best performance.
How to Close the Battery Compartment:
- Align the cover with the battery compartment and reposition it.
- Make sure the lid fits snugly and tightly to keep moisture and dust out.
- Gently push the cover to ensure it is entirely closed and secured.
Backing Up the Solar Panel:
- Find the spot where the solar panel will be installed.
- Align the solar panel connectors with the solar light’s matching terminals.
- Gently press down on the solar panel to secure the connection.
- Examine the solar panel for any loose or damaged wiring that could interfere with its operation.
- To ensure optimal charging, place the solar panel in direct sunlight.
Now that you’ve reassembled your solar light, it’s time to select the ideal location for it and enjoy the lovely illumination it offers.
Allowing Solar Lighting To Charge
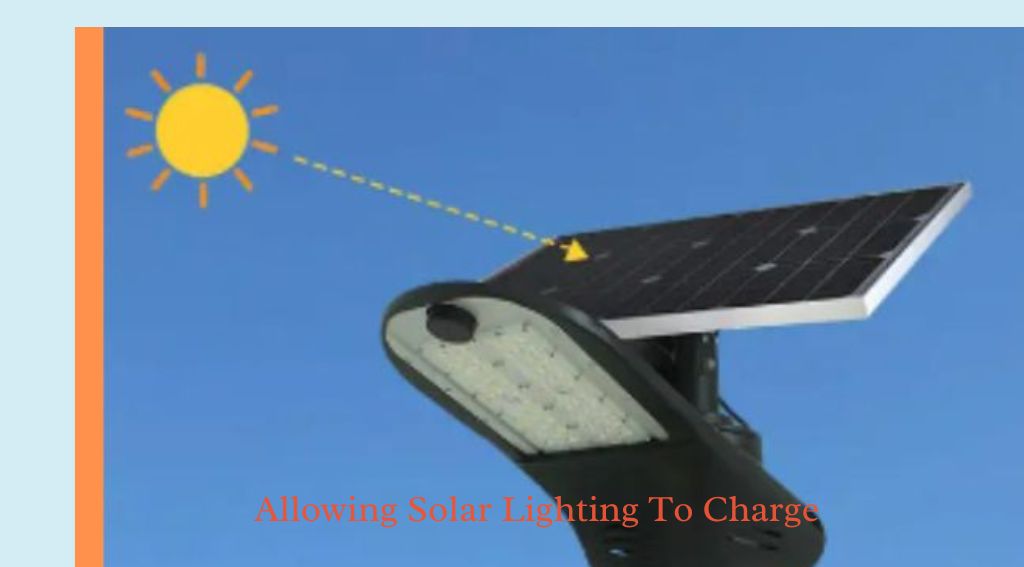
Simply charge the solar lights in direct sunlight for 48 hours to reset them. This will help to restore the light’s performance and functioning.
Positioning the Solar Light in Full Sun:
It is critical to put your solar lamp in direct sunlight for optimum charging. To increase solar energy absorption, follow these guidelines:
- Choose an appropriate location. Select an outside place that receives direct sunshine all day, such as a garden, patio, or rooftop. Ascertain that no shade or barriers are preventing sunlight from reaching the solar panel.
- The solar panel should be angled as follows: Tilt the solar panel so that it captures the most sunlight possible. For best energy absorption, a 45-degree angle is often advised.
- Align with the path of the sun: Place the solar light such that the solar panel faces south (in the Northern Hemisphere) or north (in the Southern Hemisphere). This alignment guarantees that the panel receives the maximum amount of sunlight possible.
- Avoid dark spots: Avoid densely forested areas, buildings, and tall structures that create shadows on the solar light. These shadows have the potential to dramatically diminish the amount of sunlight that reaches the solar panel.
Remember that the longer your solar lamp absorbs sunlight, the longer it will brighten your outdoor space at night.
Ensure Proper Positioning:
Aside from situating the solar light in direct sunlight, additional aspects that contribute to optimal charging must be considered. To guarantee proper positioning, follow these steps:
- Adequate spacing: Make sure your solar lights have enough space between them to avoid shade. This separation allows each lamp to get adequate sunshine on its own.
- Level ground: To prevent the solar light from tilting or falling over, place it on a level surface. The uneven ground might cause the solar panel’s alignment to be disrupted, limiting its capacity to charge effectively.
- Weather conditions: When installing solar lights, keep the local climate in mind. While solar lights can operate in a variety of weather conditions, severe temperatures, heavy snowfall, or heavy rains may impair their efficiency. Ensure that the lights are securely fixed to resist inclement weather.
You may improve the effectiveness and longevity of your solar lights by following these positioning guidelines.
Tracking the Charging Progress:
Monitoring the charging state of your solar lights regularly helps guarantee that they consistently offer appropriate illumination. Consider the following suggestions for efficient monitoring:
- Examine the solar panel regularly for any dirt, dust, or debris that may have accumulated over time. Dirty panels reduce solar absorption and reduce charging efficiency. To maintain peak performance, gently clean the panels using a moist cloth or sponge.
- Consider charging time: Solar lights typically require 6–8 hours of direct sunlight to fully charge. Keep a close eye on the charging time and, if necessary, change the orientation or alignment of the lights. If the lights do not get enough sunshine, they may not give enough illumination at night.
- Check brightness levels: Check the brightness of your solar lights in the evening. If you notice a drop in brightness or a shorter length of illumination, it could mean that the lights need to be repositioned for better charging.
Taking the effort to monitor and maintain your solar lights will ensure they produce a pleasant ambiance and enhance the aesthetic of your outdoor space constantly.
Troubleshooting Typical Problems
Resetting solar lights is a popular troubleshooting technique for problem resolution. You can quickly reset your solar lights and restore their performance by following a few simple steps.
Solar lights are an excellent method to illuminate your outdoor space while saving money on energy. However, as with any electrical item, they might occasionally experience problems that impair their effectiveness. In this part, we will troubleshoot typical issues with solar lights to help you reset them and get them back to working properly.
Let’s look at a few typical issues and how to fix them.
Dim or insufficient light output:
- Place the solar panel in direct sunlight. Solar lights use sunlight to charge their batteries. Check that no debris or shade is limiting the solar panel’s ability to collect sunlight.
- Clean the solar panels and light fittings: Dust, dirt, and grime can build up on solar panels and light fixtures, reducing their performance. To improve light output, clean them regularly with a soft cloth and mild detergent.
- Change the batteries: The batteries in solar lights might lose their ability to hold a charge over time. Replace old batteries with new ones to improve light output.
- Optimize solar light placement: If you’re having poor light output, consider relocating the lights to a location with better access to sunshine. Their performance can be considerably improved by repositioning them.
Inconsistent performance:
- Check the ON/OFF switch. Solar lights can fail due to a simple oversight. Verify that the lights are on and not accidentally turned off.
- Check the battery connection. Loose battery connections might impair power flow, resulting in inconsistency. Check to make sure the batteries are properly placed and firmly linked.
- Reset the solar light. If the light continues to behave strangely, try resetting it. Turn off the light, place it in a dark place for a few days, and then turn it back on. This can occasionally help to resolve intermittent problems.
Sensor Response Error:
- Remove any impediments: Solar lights frequently include built-in sensors that sense darkness and switch the lights on automatically. Examine the sensor for any obstructions, such as plants or decorations. The sensor response can be restored by clearing the space around the light.
- Modify the sensor settings: Some solar lights have sensor sensitivity settings that can be changed. Consult the user manual to learn how to change these parameters and tailor the response to your specific requirements.
- Replace the sensor: If the light sensor has completely ceased working, you may need to replace it. For assistance in obtaining and installing a new sensor, contact the manufacturer or see the user manual.
You may easily reset your solar lights and resume full performance by troubleshooting these frequent difficulties. Remember to give them regular attention and cleaning to keep them in good shape. Light up your outside space with assurance and efficiency!
Maintaining the Performance of Solar Lights
To reset solar lights and ensure optimal operation, turn them off, remove the batteries, wait a few minutes, reinsert the batteries, and then turn the lights back on. Maintaining your solar lights regularly will help keep them blazing brightly.
There are a few crucial maintenance suggestions to keep in mind to guarantee that your solar lights continue to perform properly and effectively. You may improve the performance and lifespan of your solar lights by following these simple steps:
Cleaning the solar panel regularly:
- Clean the solar panel surface regularly to eliminate dirt, dust, and debris that may accumulate over time.
- Gently clean the surface with a soft cloth or sponge wet with mild soap and water.
- Avoid using abrasive or strong chemicals that could damage the panel.
- After washing, make sure to wipe away any residue or soap residue.
Changing outdated batteries:
- Ensure that the batteries in your solar lights are in good operating order regularly.
- If you notice that the lights aren’t staying on as long as they used to, it’s time to replace the batteries.
- To ensure the best performance, use high-quality rechargeable batteries developed for solar lights.
- Replace the battery according to the manufacturer’s instructions, ensuring proper polarity.
Solar Light Protection During Extreme Weather:
- Severe weather, such as heavy rain, snow, or high winds, might cause damage to your solar lights.
- If severe weather is forecast, consider temporarily removing the lights and storing them indoors until the weather improves.
- If it is not possible to remove the lights, ensure that they are firmly moored and shielded from strong winds or heavy precipitation.
- Consider covering the solar panels with a waterproof and UV-resistant material to protect them from the elements.
You may assist in extending the lifespan and improving the performance of your solar lights by performing these maintenance practices. Cleaning the solar panels regularly, replacing old batteries, and shielding the lights during harsh weather conditions are all important tasks in guaranteeing the long-term performance of your solar lighting system.
Is it possible to reset solar lights without removing the batteries?
Yes, you may restart solar lights without removing the batteries. Here’s how it’s done:
- Depending on the model, turn off the solar lights by covering the solar panel or pressing the power button.
- Turn off the lights for at least 48 hours to allow the internal circuitry to reset.
- After the waiting period is over, turn the lights back on, and they should resume normal operation.
Please keep in mind that removing the batteries is not required for this reset operation. It’s a straightforward method that doesn’t require any technical knowledge.
How to Make Dollar Store Solar Lights Brighter:
How Frequently Should I Restart My Solar Lights?
Weather conditions, battery performance, and consumption are just a few of the variables that affect how frequently you reset your solar lights. To guarantee the best performance, it is advised that your solar lights be reset every 3–6 months. However, resetting them may be a quick solution if you detect any issues with their functionality, such as reduced brightness or failure to switch on.
Resetting your solar lights regularly helps to readjust the internal components and keeps them running efficiently. It also enables the batteries to fully recharge, assuring maximum power output.
Why aren’t my solar lights turning on after I reset them?
There could be a few reasons why your solar lights aren’t going on even after you’ve reset them:
- Battery depletion: Ensure that the solar panel gets enough sunlight to charge the batteries. If debris, leaves, or shade obscures the panel, it may not charge properly. Clean the panel and place it in a location where it will receive direct sunlight.
- Battery replacement: The batteries in your solar lights may degrade and lose their ability to hold a charge over time. If the lights continue to malfunction, consider replacing the old batteries with new ones.
- Faulty components: Internal components within solar lamps may be faulty in rare situations. If the troubleshooting methods do not resolve the problem, contact the manufacturer for more assistance or consider replacing the lights.
When troubleshooting or resetting your solar lights, always follow the manufacturer’s instructions and guidelines.
We hope that by answering these commonly asked questions, we can help you reset your solar lights and resolve any problems you may face. Keeping your solar lights in good working order ensures that they continue to add to the beauty and functionality of your outdoor environments.
Frequently Asked Questions: How To Reset Solar Lights
How Do You Restore Solar Lighting?
Follow these instructions to get your solar lights operating again: 1. Determine whether the solar panel is clean and receiving adequate sunshine. 2. Check that the batteries are properly placed and fully charged. 3. If necessary, replace any damaged or worn-out batteries.
4. If the previous methods do not work, consider replacing the solar light entirely.
Why do solar lights stop working suddenly?
Solar lights might go out of service unexpectedly owing to dead batteries, poor connections, a lack of sunlight, or damaged components.
What’s the Deal With My Solar Lights?
A dead battery or defective wiring could be causing problems with your solar lighting.
Conclusion
Resetting solar lights may restore them to peak function, ensuring that your outdoor areas are brightly illuminated. You may simply troubleshoot common issues like dimming lights, limited battery life, or a complete loss of illumination by following the procedures outlined above.
Cleaning the solar panel, replacing rechargeable batteries, or altering the settings are all simple methods for restoring functioning and extending the life of your solar lights. Solar lights have become a popular alternative for outdoor lighting due to their eco-friendliness and cost-saving benefits.
You can enjoy the benefits they provide for years to come by investing a little effort to reset and maintain them. So, prepare to brighten your nights and create an inviting environment in your outdoor spaces with reliable solar lights.