
How to Connect Solar Panel to Battery And Inverter Diagram?
To connect a solar panel to a battery and inverter, you need to follow a specific diagram. Here is a concise and accurate explanation of how to do it.
Connecting a solar panel to a battery and inverter can provide you with a reliable source of power. To begin, connect the positive terminal of the solar panel to the positive terminal of the battery and the negative terminal of the solar panel to the negative terminal of the battery.
Next, connect the positive terminal of the battery to the positive terminal of the inverter and the negative terminal of the battery to the negative terminal of the inverter. This setup allows the solar panel to charge the battery, which in turn powers the inverter to convert DC power to AC power.
Introduction To Solar Panels, Batteries, And Inverters
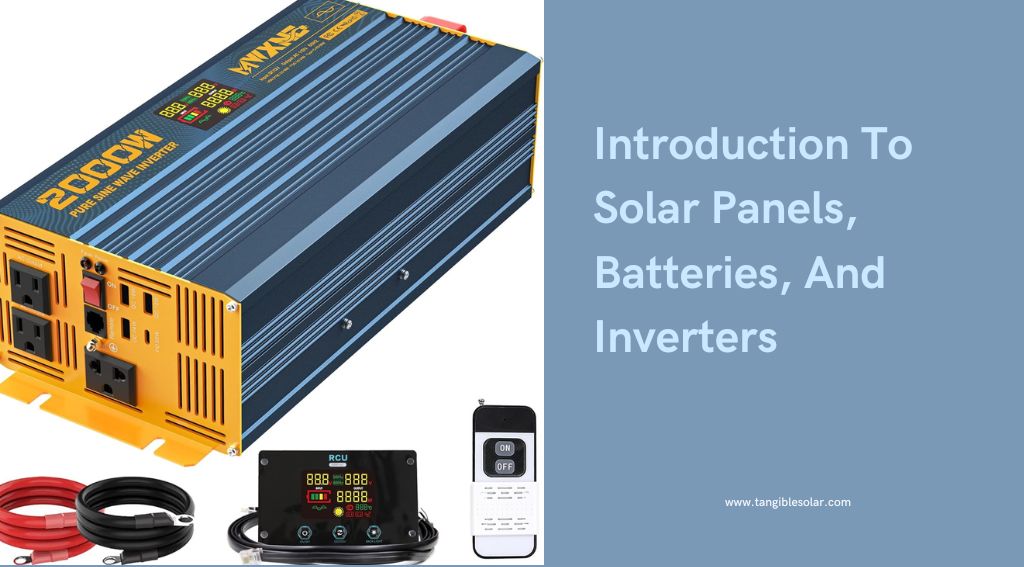
Understanding the components involved in connecting solar panels to a battery and inverter system is crucial for harnessing sustainable, renewable energy. Solar panels, batteries, and inverters play integral roles in the process of capturing, storing, and converting solar energy into usable electricity for residential, commercial, and off-grid applications.
How to Connect Solar Inverter to WiFi
Solar Panels
These panels consist of photovoltaic cells that convert sunlight into direct current (DC) electricity through a process known as the photovoltaic effect. The cells contain semiconductor materials, typically silicon, which facilitate the conversion of solar energy into usable electrical energy.
Batteries
Batteries are an essential component of a solar panel system, as they enable the storage of excess energy produced during sunny hours for use during periods of low sunlight or at night. By efficiently storing DC electricity, batteries provide a sustainable solution for powering devices or appliances when the sun is not shining. Deep-cycle batteries, such as lead-acid or lithium-ion batteries, are commonly used in solar energy systems due to their ability to handle continuous charge and discharge cycles.
Inverters
AC electricity is necessary for powering household appliances, electronic devices, and other energy-consuming devices. Inverters come in various types, including string inverters, microinverters, and power optimizers. They also provide vital features such as voltage regulation, synchronization with the utility grid, and protection against power surges or fluctuations. Successfully connecting solar panels to batteries and inverters involves understanding how each component works together harmoniously. By seamlessly integrating these components, individuals can maximize the benefits of solar energy, reduce reliance on conventional power sources, and contribute to a more sustainable future.
Solar Panel Connections
When it comes to setting up a solar power system, understand the Connect Solar Panel to Battery and Inverter Diagram. This connection ensures the conversion of solar energy into usable electrical power. In this section, we will focus on the solar panel connections and discuss the key factors to consider for efficient power generation.
How to Wire a Solar Panel to a LED Light
Choosing The Right Type Of Solar Panel
To begin with, selecting the right type of solar panel plays a vital role in optimizing the performance of your solar power system. There are various types available, including monocrystalline, polycrystalline, and thin-film panels. Each type has its own advantages and considerations. Here are some factors to keep in mind when choosing your solar panel:
- Efficiency: The efficiency of a solar panel determines how much sunlight it can convert into electricity. Higher-efficiency panels can generate more power with the same amount of sunlight.
- Cost: Consider your budget and balance it with the desired efficiency. High-efficiency panels tend to be more expensive, but they can provide better long-term returns on investment.
- Space availability: Determine the available space for solar panel installation. Different panels have different sizes and wattages, so choose accordingly to maximize power generation within the available area.
- Durability: Look for panels that are capable of withstanding environmental factors such as temperature variations, hail, and wind. Ensure that the panels have a good warranty period to protect your investment.
Factors To Consider For Efficient Power Generation
To ensure optimal power generation, there are several factors you need to consider during solar panel installation. These factors include:
- Orientation and tilt angle: Solar panels should ideally face the sun for the majority of the day. The angle of tilt should be set based on the latitude of your location to maximize solar exposure.
- Shading: Avoid placing solar panels in shaded areas, as it can significantly reduce their efficiency. Keep in mind any nearby objects (such as trees or buildings) that may cast shadows on the panels throughout the day.
- Wiring and connections: Proper wiring and connections between the solar panels, battery, and inverter are crucial for efficient power transfer. Use high-quality wiring and connect them securely for optimal performance.
- Maintenance: Regular cleaning and maintenance of solar panels are essential to ensuring they operate at their peak efficiency. Keep the panels free from dust, leaves, or any other debris that may hinder their performance.
Mounting And Positioning The Solar Panel
Mounting and positioning the solar panel is another critical aspect that can affect its overall performance. Consider the following points when installing the solar panel:
- Location: Choose a location with maximum sunlight exposure throughout the day. Avoid areas prone to heavy shade or obstructions.
- Angle and direction: Position the panels at an angle that optimizes sunlight capture. In the northern hemisphere, angling the panels towards the south tends to yield the best results.
- Mounting options: Determine the most suitable mounting option for your specific situation. Common options include rooftop installations, ground mounts, or pole mounts. Ensure that the chosen mounting structure is secure and can withstand environmental conditions.
By considering these factors and making the right choices, you can ensure efficient solar power generation by effectively connecting your solar panel to the battery and inverter. With a well-designed system, you can enjoy the benefits of clean, renewable energy while minimizing your carbon footprint.
Connecting Solar Panel To Battery
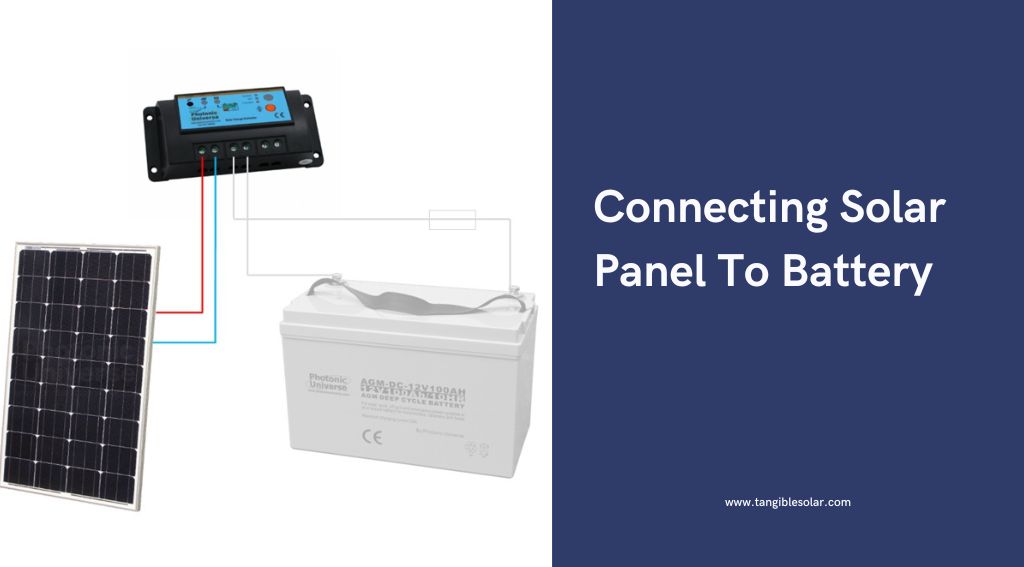
Are you looking to harness the power of solar energy and reduce your carbon footprint? Connecting solar panels to batteries is a crucial step in setting up a sustainable and efficient solar power system. In this blog post, we will guide you through the process of connecting your solar panel to a battery, ensuring seamless energy storage and utilization.
Selecting The Appropriate Battery For Your Solar System
Before delving into the technical aspects of the Connect Solar Panel to Battery and Inverter Diagram, it is essential to choose the right battery for your solar power system. The battery you select should be compatible with your solar panel and inverter, ensuring efficient energy utilization.
Consider the following factors when selecting your battery:
- Battery type: There are various battery types available, including lead-acid, lithium-ion, and gel batteries. Each type has its pros and cons, so it’s crucial to assess your energy needs and budget before making a decision.
- Battery capacity: The capacity of the battery determines how much energy it can store. Calculate your energy consumption requirements and select a battery with sufficient capacity to meet your needs.
- Battery voltage: Determine the voltage requirements of your solar power system and choose a battery with the appropriate voltage to ensure compatibility with your solar panel and inverter.
Determining The Battery Capacity And Voltage Requirements
Calculating the battery capacity and voltage requirements is crucial to ensuring optimal energy storage and utilization. Follow these steps to determine the capacity and voltage requirements:
- Estimate your daily energy consumption: Monitor your energy usage for a few days to get an estimate of your daily energy consumption. This data will help you determine the capacity of the battery you need.
- Calculate the required battery capacity: multiply your daily energy consumption by the number of days you want the battery to provide backup power. This calculation will give you the required battery capacity.
- Determine the voltage requirements. Check the voltage rating of your solar panel and inverter. Ensure that the battery voltage matches the voltage requirements of your solar power system to ensure compatibility.
Wiring The Solar Panel To The Battery
Once you have selected the appropriate battery for your solar power system and determined the capacity and voltage requirements, it’s time to wire the solar panel to the battery. Follow these steps to ensure a successful connection:
- Position the solar panel correctly. Install your solar panel in a location that receives maximum sunlight throughout the day. Proper positioning will ensure optimal energy generation.
- Check the polarity: Ensure that you connect the positive (+) terminal of the solar panel to the positive terminal of the battery and the negative (-) terminal of the solar panel to the negative terminal of the battery. Reversing the polarity can damage the battery or other components of your solar power system.
- Use appropriate wire size: To ensure minimal energy loss and maximize efficiency, use wires with the appropriate size and gauge. Consult the manufacturer’s recommendations or seek professional guidance for the ideal wire size for your specific solar power system.
- Use appropriate connectors: Use high-quality connectors to establish a secure and reliable connection between the solar panel and the battery. Improper connectors can lead to poor performance and potential safety hazards.
- Implement necessary safety measures: work in a safe and controlled environment, wear protective gear, and follow standard safety protocols. Disconnect all power sources before making any connections to avoid electrical shocks or damage to equipment.
Connecting Battery To Inverter
Connecting the battery to the inverter is a crucial step in creating an efficient and reliable solar power system. The inverter is responsible for converting the direct current (DC) electricity stored in the battery into alternating current (AC) electricity, which can be used to power your home or business. To ensure a seamless connection, it is important to choose the right inverter for your solar system, connect the battery properly, and configure the inverter settings for optimal performance.
Choosing The Right Inverter For Your Solar System
When selecting an inverter for your solar system, it is important to consider various factors, such as the size of your solar panels, the load requirements, and the efficiency of the inverter. Look for an inverter that matches the power output of your solar panels and can handle the maximum load that you anticipate. Additionally, pay attention to features such as maximum power point tracking (MPPT) capability, which can maximize the efficiency of your solar system. Consulting with a professional can help you choose the right inverter based on your specific requirements.
Connecting The Battery To The Inverter
Once you have selected the appropriate Connect Solar Panel to Battery and Inverter Diagram, The battery and the inverter should be connected using appropriate cables and connectors, ensuring a secure and reliable connection. Start by identifying the positive and negative terminals on both the battery and the inverter. Connect the positive terminal of the battery to the positive terminal of the inverter using a suitable cable and connector, and repeat the same for the negative terminals. It is important to tighten all connections securely to avoid any loose or faulty connections.
If your inverter supports multiple batteries, it may require series or parallel connections. Series connections involve connecting the positive terminal of one battery to the negative terminal of the next battery, and so on, while parallel connections require connecting the positive terminals of all batteries together and the negative terminals together. Refer to the inverter’s instruction manual for the specific connection requirements.
Configuring The Inverter Settings For Optimal Performance
After connecting the battery to the inverter, it is essential to configure the inverter settings for optimal performance. This includes adjusting parameters such as the charging current, voltage settings, and system configuration. Consult the user manual or the manufacturer’s guidelines to understand and set these parameters correctly. Setting the correct values will ensure efficient charging of the battery and optimal operation of the inverter.
Regular monitoring of the inverter’s performance is also crucial to identify any issues or inefficiencies. Pay attention to the battery charging status, inverter status lights, and any error codes displayed. This will help you quickly troubleshoot and resolve any problems that may arise, keeping your solar system running smoothly.
Solar Panel To Battery And Inverter Diagram
A solar panel system is an excellent way to harness clean and renewable energy from the sun. By connecting solar panels to batteries and inverters, you can store and use this generated power whenever you need it. However, understanding the connections and how the power flows in the system can be a bit overwhelming. That’s where a solar panel-to-battery and inverter diagram comes in handy. In this blog post, we’ll guide you on creating a diagram to visualize the connections, help you understand the flow of power, and connect the solar panel to the battery and inverter diagram.
Creating A Diagram To Visualize The Connections
To make the connections between your solar panels, batteries, and inverters easier to understand, it’s recommended to create a diagram. This diagram will act as a visual representation of the components and their connections. You can use software tools or even draw it by hand. The main components you’ll need to include in the diagram are:
| Solar Panels | Charge Controller | Batteries | Inverter |
Ensure that you depict the connections between each component clearly in your diagram. Labeling the cables and wires will also help you understand the overall setup better.
Understanding The Flow Of Power In The System
Once you have your diagram, it’s crucial to understand how power flows through your solar panel system. The process generally follows these steps:
- Solar panels capture sunlight and convert it into DC (direct current) electricity.
- The DC electricity is then sent to the charge controller. This device regulates the flow and prevents overcharging of the batteries.
- The charge controller stores the excess electricity that the solar panels produce by charging the batteries.
- When power is needed, the batteries release the stored electricity.
- The inverter converts the DC electricity from the batteries into AC (alternating current) electricity, which is commonly used for household appliances and devices.
- The AC electricity is then distributed to your home or connected to the grid, depending on your setup.
Understanding this flow of power will enable you to identify any potential issues or bottlenecks in your system.
Troubleshooting Common Issues In The Diagram
While a solar panel-to-battery and inverter diagram simplifies the overall connection process, it’s important to troubleshoot potential problems. Here are some common issues you may encounter:
- Loose connections: Check that all the cables and wires are securely connected to their respective components.
- Wrong wiring sequence: Double-check that you have connected the positive and negative terminals correctly.
- Make sure that the charge controller, batteries, and inverter can handle the power that the solar panels produce.
- Inadequate battery capacity: Verify that your batteries have enough capacity to store the desired amount of electricity.
- Faulty components: Inspect each component for any signs of damage or malfunction that may affect their performance.
Identifying and resolving these issues will optimize the efficiency and functionality of your solar panel system.
FAQs: How To Connect Solar Panel To Battery And Inverter Diagram
How Do I Connect A Solar Panel To A Battery And Inverter?
To connect a solar panel to a battery and inverter, you will need to use a charge controller. The solar panel is connected to the charge controller, which regulates the flow of electricity to the battery. The battery is then connected to the inverter, which converts the DC power from the battery into AC power for use in your home.
Can I directly connect a solar panel to a battery without an inverter?
Yes, you can directly connect a solar panel to a battery without an inverter. However, you will only be able to use the DC power from the battery for devices that run on DC power. If you want to use AC-powered devices, you will need to use an inverter to convert the DC power from the battery into AC power.
Why do I need a charge controller for my solar panel?
A charge controller is necessary because it regulates the flow of electricity from the solar panel to the battery. It prevents overcharging of the battery and protects it from damage. Additionally, a charge controller ensures that the battery is charged efficiently, which extends its lifespan and maximizes the performance of your solar panel system.
Conclusion
Connecting a solar panel to a battery and inverter is a crucial step in harnessing renewable energy. By following the provided diagram and guidelines, you can ensure an efficient and reliable power system for your needs. Remember to consider safety precautions and consult a professional if needed.
With this knowledge, you can take a step towards a sustainable and cost-effective energy solution. Start harnessing the power of the sun today!